Get ready to meet your new favorite no-bake dessert — Peanut Butter Jelly Pie! This sweet and salty masterpiece is everything you love about a classic PB&J sandwich, but transformed into a creamy, dreamy pie that’s perfect for any day of the week. Whether you’re after a quick treat for the family or want to impress at a potluck, this pie delivers big flavor with almost no effort.
Why You’ll Love This Recipe
- Ridiculously Easy: No oven, no fuss. This pie is all about stirring, layering, chilling, and devouring.
- Nostalgic Flavor: If you grew up on PB&J sandwiches, this pie will hit you right in the childhood.
- Perfectly Balanced: Rich, nutty peanut butter filling meets tart-sweet jelly on a buttery crust — it’s a texture and flavor match made in dessert heaven.
- Great for Make-Ahead: You can (and should!) make this pie in advance. It gets even better after chilling.
Ingredients You’ll Need

Here’s what you’ll need to create this peanut buttery, jelly-filled wonder:
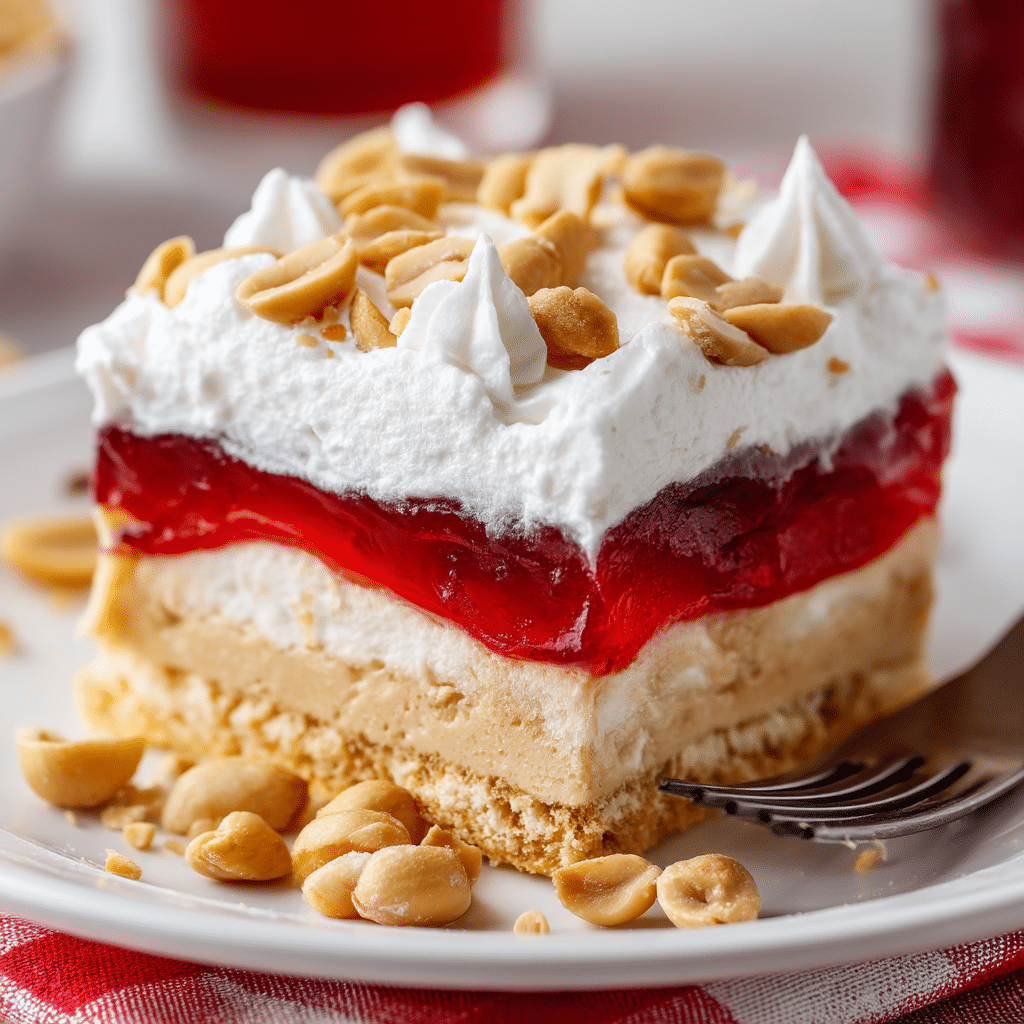
- Graham Cracker Crust: Provides a buttery, slightly crunchy base that complements the creamy filling. Use store-bought for ease or make your own.
- Creamy Peanut Butter: Go for the regular, sweetened kind for the best texture and taste — natural peanut butter tends to separate and can make the filling grainy.
- Cream Cheese: Adds a tangy richness and helps create a smooth, luscious filling.
- Powdered Sugar: Sweetens the filling without making it gritty.
- Whipped Topping: Folded into the filling to make it light, fluffy, and mousse-like. You can also whip your own cream if you’re feeling fancy.
- Your Favorite Jelly or Jam: Strawberry and grape are the classics, but raspberry or mixed berry work beautifully too. You’ll swirl or spread it on top for that unmistakable PB&J vibe.
- Crushed Peanuts (optional): For a little crunch on top and extra peanut flavor.
Variations
- Chocolate Twist: Add a layer of melted chocolate between the crust and filling for a peanut butter cup vibe.
- Nut-Free Version: Use sunflower seed butter and a nut-free crust for an allergy-friendly dessert.
- Crust Swap: Try it with an Oreo crust or a vanilla wafer crust for a different flavor base.
- Fruit Switch: Experiment with different jams like blueberry-lavender, peach, or cherry for a fun spin on the classic.
How to Make Peanut Butter Jelly Pie
Step 1: Prepare the Crust
If making your own crust, combine crushed graham crackers with melted butter and a touch of sugar. Press into a pie dish and chill in the fridge while you prep the filling.
Step 2: Make the Peanut Butter Filling
Beat together the peanut butter, cream cheese, and powdered sugar until completely smooth and creamy. Gently fold in the whipped topping until the mixture is fluffy and well combined.
Step 3: Fill the Pie
Spread the peanut butter filling evenly into your prepared crust. Smooth the top with a spatula.
Step 4: Add the Jelly Topping
Spoon your jelly or jam across the top and gently swirl it in with a knife or offset spatula. You can also simply spread it in a smooth layer.
Step 5: Chill
Cover and refrigerate the pie for at least 4 hours, or until it’s fully set. Overnight is even better if you can wait!
Step 6: Garnish and Serve
Top with crushed peanuts, extra whipped cream, or a drizzle of more jelly before slicing and serving.
Pro Tips for Making the Recipe
- Room Temp Cream Cheese: Let your cream cheese soften before mixing — it blends so much more smoothly.
- Don’t Overmix the Whipped Topping: Gently fold it in to keep the filling light and airy.
- Use High-Quality Jam: Since jelly is front and center here, choose one you love. A chunky, fruit-forward jam gives extra texture and flavor.
- Chill Well: This pie needs time to firm up. Rushing it will give you a messy slice — still tasty, but not as pretty.
How to Serve
Peanut Butter Jelly Pie is best served chilled, straight from the fridge. Pair it with:
- Cold Milk: Just like the sandwich, a glass of milk is its perfect companion.
- Hot Coffee: The slight bitterness of coffee balances the sweetness of the pie.
- Fresh Berries: Add some sliced strawberries or blueberries on the side for a pop of freshness.
Make Ahead and Storage
Storing Leftovers
Store leftover slices covered in the refrigerator for up to 5 days. The texture actually improves after a day or two!
Freezing
This pie freezes beautifully. Wrap it tightly and freeze for up to 2 months. Thaw overnight in the fridge before serving.
Reheating
No reheating needed — this pie is served chilled. Just slice and enjoy!
FAQs
Can I make this pie ahead of time?
Yes, absolutely! In fact, it’s better that way. Making it the night before gives the filling time to fully set, making it easier to slice and even more delicious.
Can I use crunchy peanut butter?
You can, but keep in mind it’ll make the filling a little less smooth. If you like that extra texture, go for it!
What kind of jelly works best?
Grape and strawberry are the go-tos, but raspberry and mixed berry add a nice tart balance. Choose a jam that’s not too runny to avoid a soupy topping.
Can I make this pie dairy-free?
Yes! Use dairy-free cream cheese, a coconut-based whipped topping, and check your crust ingredients. The texture may be slightly different but still tasty.
Final Thoughts
This Peanut Butter Jelly Pie is pure joy in dessert form — easy, nostalgic, and irresistibly good. Whether you’re making it for a crowd or just treating yourself, it’s a low-effort, high-reward recipe that never fails. So grab that pie dish and make a little magic happen. You’re going to love every creamy, jelly-swirled bite.
Print
Peanut Butter Jelly Pie Recipe
- Prep Time: 20 minutes
- Cook Time: 0 minutes
- Total Time: 4 hours 20 minutes (including chilling)
- Yield: 8 servings
- Category: Dessert
- Method: No-Bake
- Cuisine: American
- Diet: Vegetarian
Description
A fun and nostalgic dessert, this Peanut Butter Jelly Pie combines the creamy richness of peanut butter with the fruity sweetness of jelly in a graham cracker crust. Perfect for a no-bake treat that everyone will love.
Ingredients
- 1 1/2 cups graham cracker crumbs
- 1/3 cup melted butter
- 1/4 cup granulated sugar
- 1 cup creamy peanut butter
- 8 oz cream cheese, softened
- 1 cup powdered sugar
- 1 tsp vanilla extract
- 1 cup heavy whipping cream
- 1/2 cup jelly or jam (grape or strawberry preferred)
Instructions
- In a bowl, combine graham cracker crumbs, melted butter, and granulated sugar. Press mixture into a 9-inch pie dish to form the crust. Refrigerate for at least 30 minutes.
- In a large bowl, beat together peanut butter, cream cheese, powdered sugar, and vanilla extract until smooth.
- In a separate bowl, whip the heavy cream until stiff peaks form. Gently fold whipped cream into the peanut butter mixture.
- Pour the filling into the prepared crust and smooth the top.
- Spoon jelly over the top and swirl gently with a knife to create a marbled effect.
- Chill the pie in the refrigerator for at least 4 hours or until set.
- Slice and serve cold.
Notes
- You can use crunchy peanut butter for added texture.
- Try different flavors of jelly to change things up.
- For a firmer pie, freeze for 1 hour before serving.